
Adobe’s PDF Optimizer
Acrobat 8’s PDF Optimizer (Advanced -> PDF Optimizer) is an improved version of Acrobat 7’s PDF Optimizer – both of which are interfaces into Distiller’s settings (see Figure 3). You can strip, flatten, downsample resolutions, and remove features from your PDF to minimize its file size. Note that our test PDF (Chapter 2 of Speed Up Your Site [2.pdf [subsetted fonts], and 2opt.pdf [refried PDF, noembed]) is in version 1.3 from Acrobat 4.
Audit Space Usage
The next step when optimizing PDFs is to audit the size of the different components that make up your PDF. In Acrobat 8 Professional choose Advanced -> PDF Optimizer and click on the Audit Space Usage button (see Figure 4). This dialog shows which components of your PDF are taking up the most space, in bytes for each element and the percentage of total file size (see Figure 5). Concentrate your efforts on the largest areas. In our case fonts take up the most space, with content streams (text), and document overhead next in percentage of total file size.
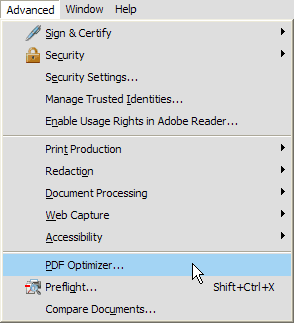
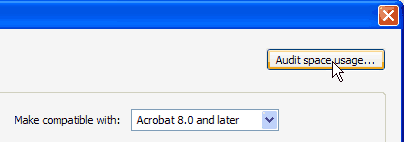
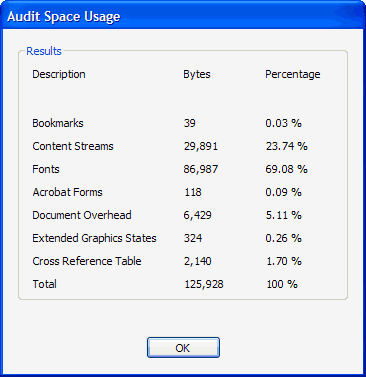
Figure 5: Audit Space Usage of Chapter 2 of Speed Up Your Site
Optimize Images
The first option in the PDF Optimizer settings panel is Images. The Image Settings panel lets you downsample images to lower image resolution. For web use you only need 72 dpi for color images, and 150 dpi is a good compromise for monochrome images. Choose JPEG compression for smooth-toned color images and ZIP for flat-color images that would normally be compressed as a GIF or PNG. Choose JBIG2 compression for monochrome images (supported in Acrobat 5 or higher) and lossy compression (see Figure 6). If you use Acrobat 6 compatibility mode or higher you can use JPEG2000 instead of JPEG compression. JPEG2000 is slightly more efficient than JPEG compression.
Figure 6: Optimizing Image Settings Dialog
Downsampling to lower resolutions
PDFs for web viewing need not be ready for offset printing. Many PDFs we tested on the Web were too large in file size for their intended purpose, viewing in a browser. Testing a random sample of large PDFs (1Mb to 15Mb in size) I found many of them had images and resolutions set too high. You can downsample your images, without changing the compression to realize significant savings in file size. After choosing Advanced -> PDF Optimizer -> Images and downsampling to a conservative 150 dpi for color images and preserving current compression (no visible change in appearance) the PDFs I tested shrank by anywhere from 1/2 to 1/10 their original size, and still looked nearly identical on screen (see Figure 7).
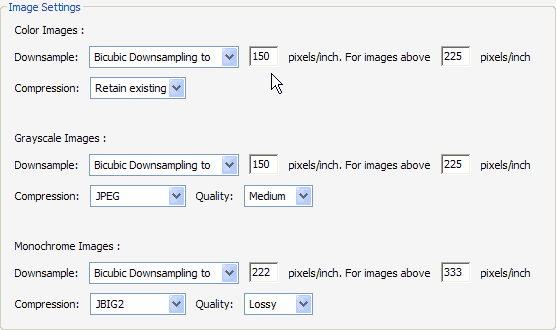
Figure 7: Downsampling in Image Settings Panel in Acrobat 8
Compress Scanned Pages
If you scan pages into your PDF use the Optimized Scanned PDF panel to optimize the compression of page regions based on their color content. The adaptive compression slider balances file size and quality with six filters (see Figure 8, set for maximum compression). You can play with these settings to see which gives you acceptable results. For all other documents use the Optimizing Images panel.
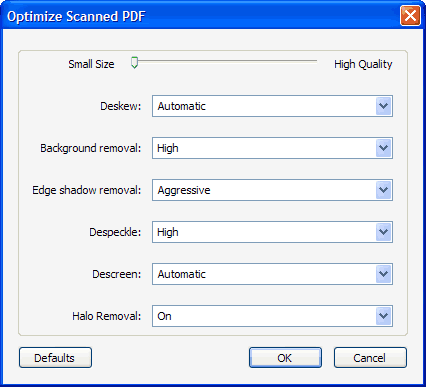
Figure 8: Scanned Page Settings Dialog – Aggressive Settings Shown
Avoid Flatten Transparency and Outline Fonts
You can no longer flatten transparent artwork by choosing Flatten transparency in the Transparency panel in Acrobat 8. In Acrobat 7 this feature divided overlapping transparent areas into rasterized or vector regions (see Figure 9). Note that flattening transparency will almost always create a larger PDF, but in some cases will create a smaller one (especially with outline fonts on). The flattening process makes the file less viable for both screen and print. Always keep transparency “live” for Web or screen documents, or avoid using it in the first place.
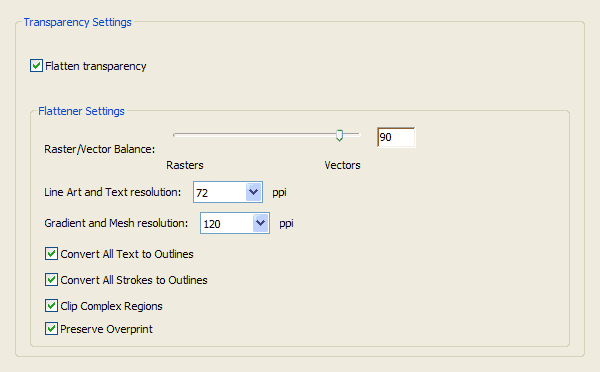
Figure 9: Transparency Settings Dialog in Acrobat 7
Note in Acrobat 7 that I’ve selected Convert All Text to Outlines (see Figure 9). This converts the text in your PDF to mathematical outlines which can be smaller than embedded fonts, and compressed with the ZIP compression algorithm. However, enabling this option will remove the ability to search the text that was within transparent objects. Apago’s PDF Enhancer offers “searchable outlines” using both mathematical outlines backed by efficient Type 3 fonts for search engines. To test if the text data is still there, select all in Acrobat, and paste the results into your favorite text editor. If the text appears, the data is still there.
Acrobat 8 Pro Transparency Panel
In Acrobat 8 the transparency panel now ships with default settings of low, medium, and high resolution (see Figure 10). “Low” convert strokes to outlines, and preserves overprint. “Medium” resolution bumps up the resolution and adds clip complex regions, and “High” does no outline conversion and has higher resolutions. Note that none of the transparency settings allow you to convert text to outlines. This is by design, because text outlines make your document less accessible and is a one-way operation.
Figure 10: Transparency Settings Dialog
Advanced Flattening in Acrobat 8 Pro
However, you can still convert text to outline fonts in the Flattener Preview dialog. Select Advanced -> Print Production -> Flattener Preview menu option (see Figure 11).
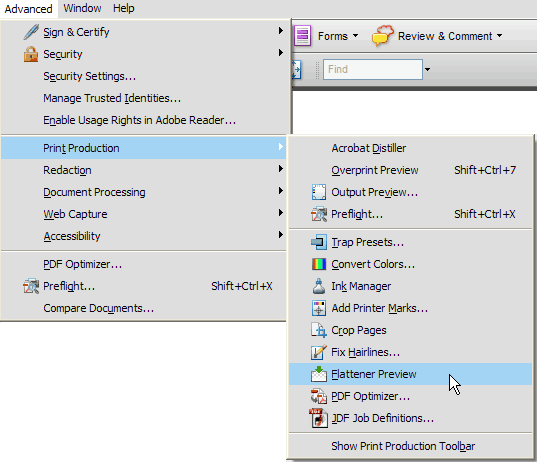
Figure 11: Selecting Flattener Preview in Advanced -> Print Production Menu
In the Flattener Preview dialog you can still check “Convert All Text to Outlines” (see Figure 12) but remember the caveats above. Outlined text is not recommended for web use in Acrobat 8, as it makes the document less accessible and removes textual information useful for search engine visibility.
Figure 12: Flattener Preview Dialog